
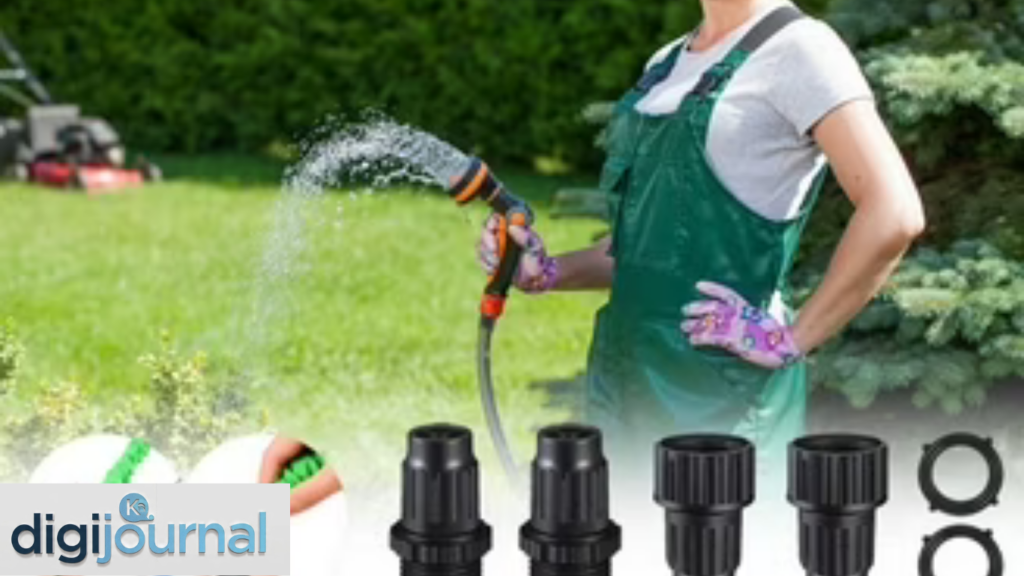
If you’ve ever gone out to water your garden only to find your hose spraying water in all the wrong places, you know just how frustrating that can be. Well, don’t throw that hose away just yet! Choosing the best garden hose repair kit can save you a good chunk of money and get your watering routine back on track in no time. Whether you’re dealing with a cracked connector, a mid-hose burst, or a worn-out nozzle end, the right repair kit is truly a gardener’s best friend.
In this guide, we’ll walk you through everything you need to know — from what to look for in a quality repair kit, to step-by-step tips, product comparisons, and expert advice. Let’s dig in!
Why the Best Garden Hose Repair Kit Is Worth Every Penny
Let’s be honest — garden hoses don’t come cheap. A high-quality hose can run anywhere from $30 to over $100. So when it springs a leak or the connector cracks under pressure, the last thing you want to do is toss the whole thing out. That’s where a solid repair kit steps in and saves the day.
Here’s why investing in a top-notch repair kit makes complete sense:
- Cost-effective: A repair kit typically costs between $5 and $20 — far less than replacing the entire hose.
- Eco-friendly: Fixing rather than replacing reduces plastic waste and keeps old hoses out of landfills.
- Convenient: Most repairs take less than 10 minutes with the right tools.
- Versatile: Many kits work on multiple hose sizes and brands.
- Long-lasting fix: Quality brass or stainless steel fittings can outlast the hose itself.
It’s a no-brainer, really. A small investment today can extend the life of your garden hose by years.
Understanding the Types of Garden Hose Damage
Before you rush out and grab the first repair kit you see, it’s important to know what kind of damage you’re dealing with. Not all hoses fail the same way, and — here’s the kicker — the type of damage determines which repair solution is best.
Mid-Hose Cracks and Bursts
These happen when the hose kinks repeatedly, freezes in cold weather, or is left in direct sunlight for too long. Mid-hose repairs usually require a hose mender connector — a short fitting that joins the two cut ends of a damaged hose.
Leaky or Broken End Connectors
The connectors at both ends of a hose take a beating every time you attach or detach them. Over time, the threads wear out, the washer deteriorates, or the plastic cracks. A hose end repair fitting can replace the damaged connector entirely.
Loose or Damaged Nozzle End
If water is seeping around the base of your nozzle, chances are the O-ring or rubber washer has given up the ghost. Many kits include replacement washers and O-rings for quick fixes.
Pinhole Leaks
Sometimes caused by punctures from garden tools or UV damage, these tiny but annoying leaks can be handled with hose repair tape or a small clamp fitting included in comprehensive kits.
Key Features to Look for in the Best Garden Hose Repair Kit
Not all kits are built the same. When you’re shopping around, keep these features at the top of your checklist:
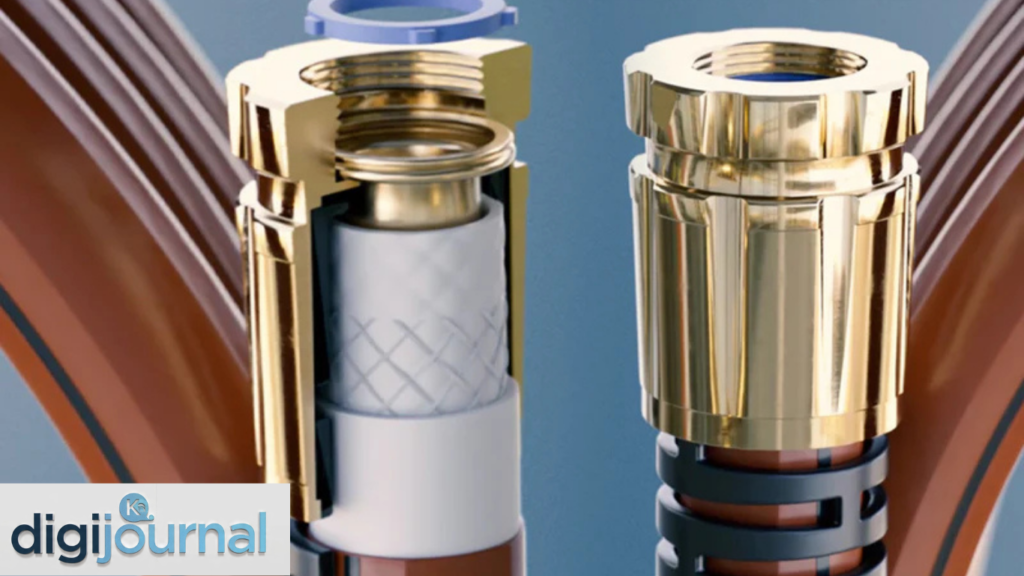
Material Quality
Brass is king when it comes to durability. Brass fittings resist corrosion, handle high water pressure without breaking a sweat, and last far longer than plastic alternatives. Some premium kits offer stainless steel components, which are even more resistant to rust and wear. Avoid all-plastic kits if you’re looking for something that’ll truly go the distance.
Compatibility
Your garden hose likely measures either 5/8 inch or 3/4 inch in diameter — these are the two most common sizes. The best repair kits are designed to work with both, but always double-check the package before buying. Mismatched fittings are a recipe for frustration.
Ease of Use
Look for kits that come with clamps, ferrules, or barbed connectors that can be installed without special tools. Some designs simply snap or twist into place, making repairs genuinely quick and painless.
Variety of Components
A well-rounded kit should include:
- Male and female connectors for end repairs
- Hose mender (coupler) for mid-hose fixes
- Hose clamps (stainless steel, ideally)
- Replacement washers and O-rings
- Instructions or a guide
Pressure Rating
Check that the fittings are rated for typical residential water pressure, which is usually between 40 and 80 PSI. Using fittings rated below your system’s pressure is asking for trouble.
Top Picks: Best Garden Hose Repair Kits on the Market
Here’s a handy comparison table of some of the top-rated options available today:
| Kit Name | Material | Hose Sizes | Includes Clamps | Best For |
| Gilmour Hose Repair Kit | Brass | 5/8″ & 3/4″ | Yes | All-round home use |
| Melnor Metal Repair Kit | Zinc alloy | 5/8″ | Yes | Budget-friendly repairs |
| AMES Master Gardener Kit | Brass | 5/8″ & 3/4″ | Yes | Heavy-duty garden use |
| Dramm Brass Repair Kit | Solid brass | 5/8″ | No | Premium quality builds |
| Orbit Hose Repair Kit | Plastic/Metal | 5/8″ & 3/4″ | Yes | Quick DIY beginners |
| Swan Products Repair Kit | Brass | 3/4″ | Yes | Large-diameter hoses |
| Teknor Apex Kit | Polymer + Brass | 5/8″ & 3/4″ | Yes | Versatile multi-repair |
Each of these kits brings something a little different to the table. For most home gardeners, a brass kit that fits both 5/8″ and 3/4″ hoses and includes clamps will cover virtually every repair scenario you’re likely to encounter.
How to Use a Garden Hose Repair Kit: Step-by-Step
Alright, you’ve got your kit — now what? Don’t sweat it. Repairing a garden hose is genuinely straightforward, even if you’ve never done it before. Here’s a simple step-by-step breakdown:
What You’ll Need
- Your chosen repair kit
- A sharp utility knife or hose cutter
- A screwdriver (usually flathead)
- A bucket or towel (for draining residual water)
Steps for a Mid-Hose Repair
Step One — Turn off the water. Before anything else, shut off the water supply completely. You don’t want a surprise shower while you’re working.
Step Two — Cut out the damaged section. Using a sharp utility knife, cut cleanly on both sides of the damaged area. Make sure your cuts are as straight as possible — a clean cut ensures a tight fit.
Step Three — Soften the hose ends (if needed). If your hose is stiff, dip the cut ends in hot water for 30 seconds. This makes sliding the fitting in much easier.
Step Four — Insert the mender connector. Push each end of the hose firmly onto the barbed mender fitting. It should slide in with a bit of effort — that’s a good sign it’s the right size.
Step Five — Secure with clamps. Slide a hose clamp over each end and position it about half an inch from the end of the hose. Tighten the screw firmly with your screwdriver.
Step Six — Test the repair. Turn the water back on slowly and check for any leaks around the repair site. If you see drips, tighten the clamps a little more.
And just like that — you’re done! Most repairs genuinely take under 10 minutes once you’ve got the hang of it.
Common Mistakes to Avoid When Using a Hose Repair Kit
Even the best garden hose repair kit won’t deliver great results if it’s used incorrectly. Watch out for these all-too-common slip-ups:
- Skipping the cut: Trying to repair over damaged hose material rather than removing it is a recipe for repeat leaks.
- Using the wrong size fitting: Always measure your hose diameter before buying. A 3/4″ fitting won’t seal properly on a 5/8″ hose.
- Overtightening clamps: It feels like more is more, but overtightening can actually damage the hose material and create new leaks.
- Not softening the hose: Forcing a stiff hose onto a fitting can make it difficult to achieve a watertight seal.
- Ignoring the O-rings: If the O-ring isn’t seated properly inside a connector, you’ll get leaks no matter how tight the clamp is.
A little care and attention goes a long way here. Take your time, follow the instructions, and you’ll be golden.
Best Garden Hose Repair Kit for Different Needs
Every gardener is a little different, and so are their repair needs. Here’s a quick breakdown of which type of kit suits which situation:
For Beginners
Look for kits that are labeled “tool-free” or “no-tool required.” These typically use push-fit or twist-lock mechanisms that are genuinely foolproof. The Orbit Hose Repair Kit is a fan favourite for beginners.
For Heavy-Duty or Commercial Use
If you’re running irrigation systems or dealing with constant high-pressure use, invest in an all-brass kit with reinforced clamps. The Dramm Brass Repair Kit or AMES Master Gardener Kit are excellent choices for more demanding tasks.
For Older or Vintage Hoses
Older hoses can be thicker and more rigid. Opt for a kit that includes a hose cutter and comes with a range of clamp sizes to accommodate different wall thicknesses.
For Quick Emergency Fixes
Keep a roll of self-fusing silicone repair tape or a rubber hose patch kit in your garden shed for those moments when you need a temporary fix in a hurry. They won’t last forever, but they’ll get you through the day until you can make a proper repair.
How to Extend the Life of Your Garden Hose (and Avoid Future Repairs)
Prevention, as they say, is better than cure. A well-maintained garden hose can last a decade or more. Here’s how to keep yours in tip-top shape:
- Store it properly: Always drain your hose after use and coil it loosely. Kinks are one of the most common causes of hose damage.
- Use a hose reel: A proper reel keeps the hose neatly coiled and prevents UV damage.
- Avoid leaving it in the sun: Prolonged UV exposure breaks down the hose material over time. Store it in the shade or a shed when not in use.
- Drain it before winter: Water left inside a hose can freeze and crack it from the inside. Always drain and store hoses indoors during cold months.
- Use rubber washers: Replace the rubber washer in your connectors at least once a season to prevent leaks at the connection point.
- Don’t run vehicles over it: It sounds obvious, but it happens more often than you’d think!
A bit of TLC goes a very long way. The goal is to never need that repair kit too often — but it’s always great to have it on hand when you do.
Comparing DIY Repair vs. Buying a New Hose
Here’s a fair question: sometimes, is it actually worth repairing an old hose at all? Let’s weigh both sides honestly.
| Factor | DIY Repair | Buy New Hose |
| Cost | $5–$20 | $30–$100+ |
| Time | 5–15 minutes | 30+ min (shopping + setup) |
| Environmental impact | Low (extends hose life) | Higher (adds to waste) |
| Quality of fix | Permanent with right kit | Brand new start |
| Skill required | Minimal | None |
| Best when | One or two isolated leaks | Hose is severely damaged throughout |
The bottom line? If your hose has one or two problem spots, repair it. If it’s cracked from end to end or has lost its structural integrity completely, it may genuinely be time to start fresh.
Expert Tips for Getting the Most Out of Your Repair Kit
Here are a few pro-level tips that can make your repair experience smoother and your results more reliable:
- Buy a kit with extra parts: You’ll likely use a washer or clamp again in the future, so having spares on hand is smart.
- Mark the repair spot before cutting: Use a permanent marker to note exactly where the damage is so you don’t cut in the wrong place.
- Use a hose cutter instead of a knife: A proper hose cutter creates a perfectly square cut and is much safer than a utility knife.
- Apply a thin layer of petroleum jelly to barbed fittings: This makes insertion easier and creates a better seal.
- Store your kit in a waterproof bag: Keep it in your garden shed or tool box so it’s ready to go the moment you need it.
Conclusion
At the end of the day, every garden deserves a reliable water source — and every gardener deserves a quick, easy fix when things go wrong. The best garden hose repair kit isn’t necessarily the most expensive one on the shelf; it’s the one that matches your hose size, offers durable materials (brass is always a safe bet), and gives you everything you need to make a lasting repair.
Whether you’re a weekend warrior tending a small flower bed or a serious grower managing a large vegetable patch, keeping a quality repair kit nearby is simply good sense. It saves money, reduces waste, and keeps your garden looking its very best all season long.
So next time your hose springs a leak, don’t panic — just reach for the best garden hose repair kit and get back to what you love: growing beautiful things.
FAQs
What is the best garden hose repair kit for a 5/8 inch hose?
For a 5/8 inch hose, the Gilmour Brass Repair Kit and the Dramm Brass Repair Kit are both excellent choices. They offer solid brass fittings specifically sized for 5/8 inch hoses and include stainless steel clamps for a watertight, lasting seal.
Can I repair a garden hose without special tools?
Absolutely! Many of the best garden hose repair kits on the market today are designed for tool-free installation. Push-fit and twist-lock connectors can be installed using just your hands, although a screwdriver is useful if your kit includes screw-type hose clamps.
How long does a garden hose repair last?
When done correctly using quality brass fittings and stainless steel clamps, a hose repair can last for several years — often outlasting the rest of the hose itself. Cheap plastic fittings, on the other hand, may begin to fail within a single season.
Is it better to repair a garden hose or buy a new one?
In most cases, repairing is the smarter, more economical choice — especially if the damage is limited to one or two spots. The best garden hose repair kit costs a fraction of a new hose and can be used multiple times. However, if a hose is severely degraded throughout, replacement makes more sense.
What size hose repair kit do I need?
Most residential garden hoses come in either 5/8 inch or 3/4 inch diameters. Before purchasing a kit, measure your hose’s outer diameter or check the label on the hose. Many quality kits include fittings for both sizes, which is the most versatile option for most gardeners.